Sunday, July 24, 2011

The Last Post

Well, this will be the last entry on this blog.

I've started a new one site for the HZ Wagon rebuild.  If you'd like to visit it (and follow it) you can visit http://hzpremwagon.blogspot.com

Monday, July 4, 2011

Gone!

Well, the van is gone so this blog will no longer be updated (not that it was updated very often anyway!).

We sold the van to finance the next project, which is a 1978 HZ Premier Wagon.  I'll create a new blog (perhaps) or I might just throw photos at Facebook.


Thanks for those who have followed!

Friday, March 4, 2011

Off the the show

Tomorrow (5th March, 2011) the van will be at the Geelong Holden Day - run by the local Holden club, of which I'm a member. Should be a good day, with the weather expected to be clear and mostly sunny.


I'll upload a few pictures after the show.

Saturday, October 30, 2010

Under bonnet clean up

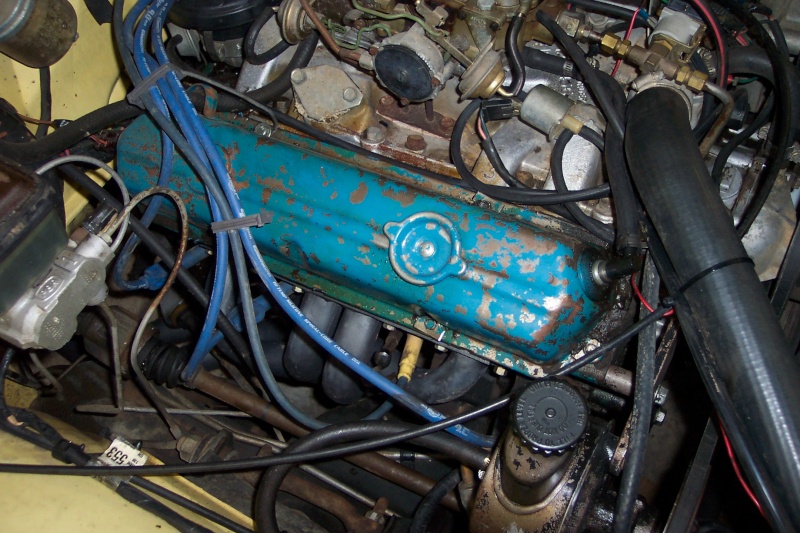
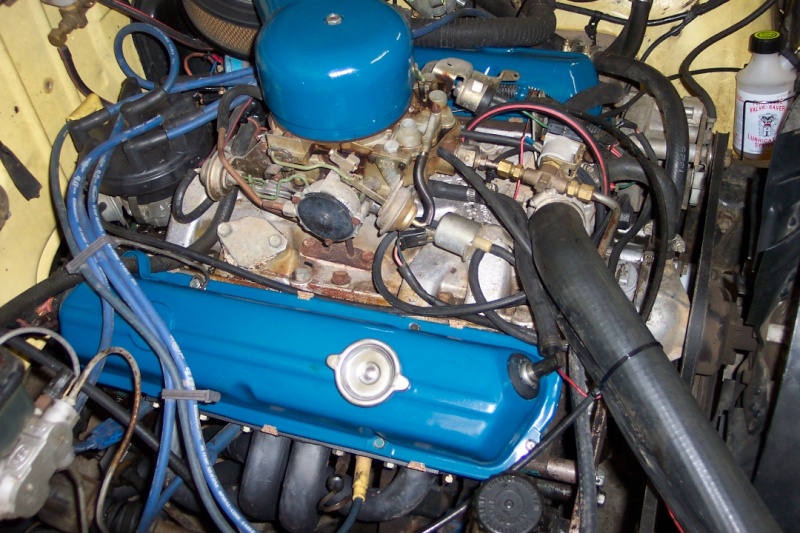
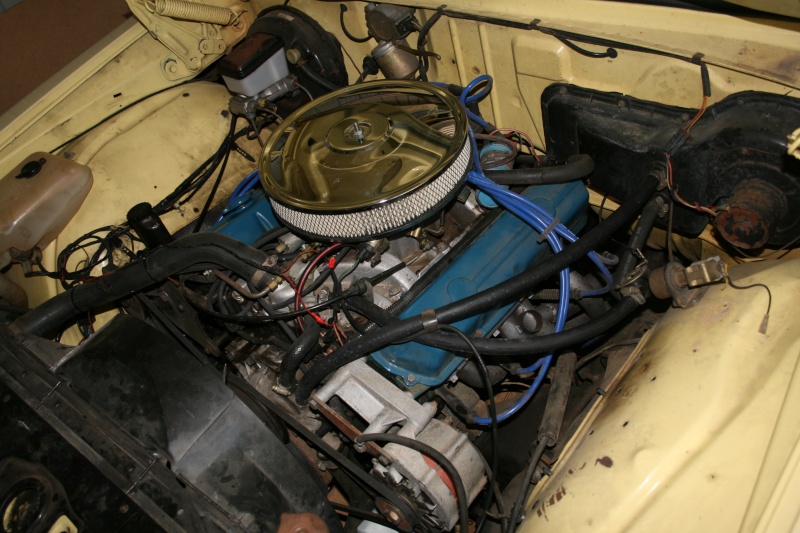
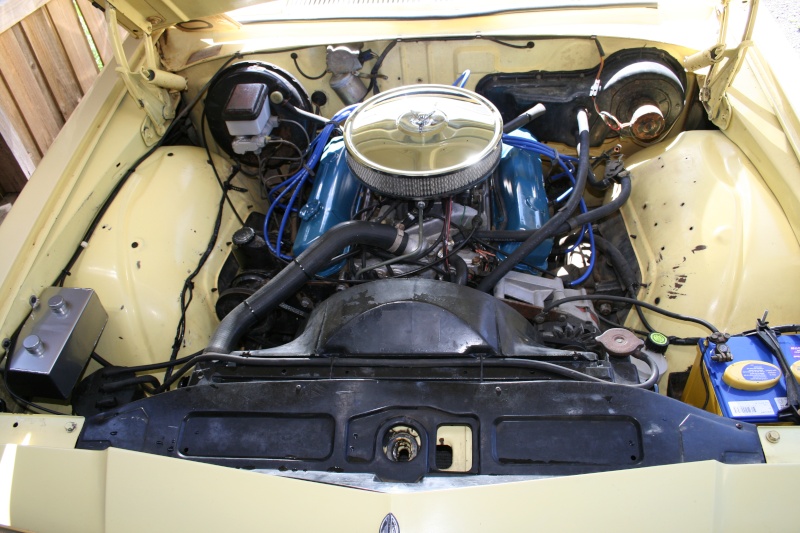
Another update (wait, it hasn't been six months yet?). Got a bit more done last weekend, and the engine bay is starting to look half decent. I figured this needs to be cleaned up in case someone opens the bonnet at a show and shine. Shocked

This is what I started with 5 years ago:


I did some painting to improve the look a bit, but I've never been happy with the dual fuel snorkel and all the extra plumbing:


Before the Albury run I removed most of the LPG, however the electric fuel pump and a lot of the wiring was still there.


I've finally managed to clean it up, put a mechanical fuel pump in and get the thing looking half decent:


A couple of you may recognise the replacement washer bottle / radiator overflow. The standard WB unit is a huge plastic thing. Functional, but hardly pretty.

That's probably all I'll do for now, as there are that many holes in the inner guards I'll replace the guards and hide the wiring when I paint the car.

Friday, October 22, 2010

New seats

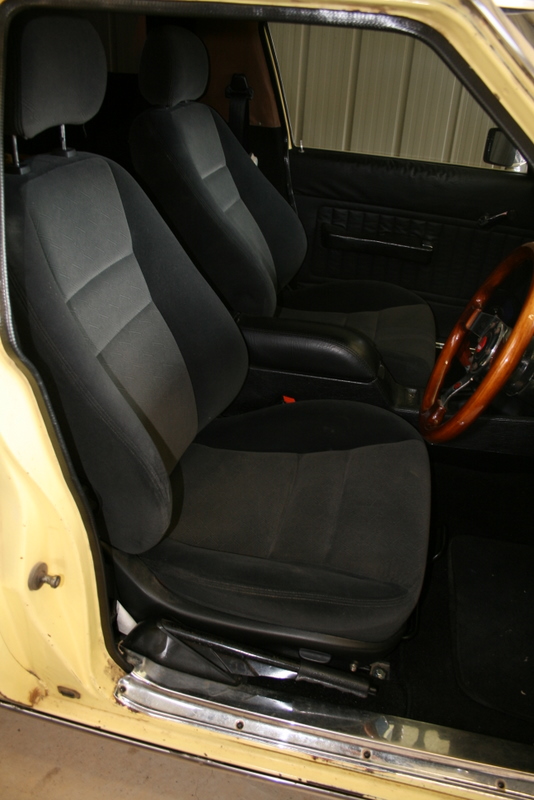
Ok, the new seats have been in for just over a week, and I must say they are brilliant!  Here's a little guide to how I did them, and (of course) some photos.

Disclaimer: This was the way I approached the project, and may not necessarily be the best or easiest way to tackle this.

I already knew that the front bolt holes in the VZ seats will line up with the WB front seat holes in the floor. That's the only thing that's easy about this!

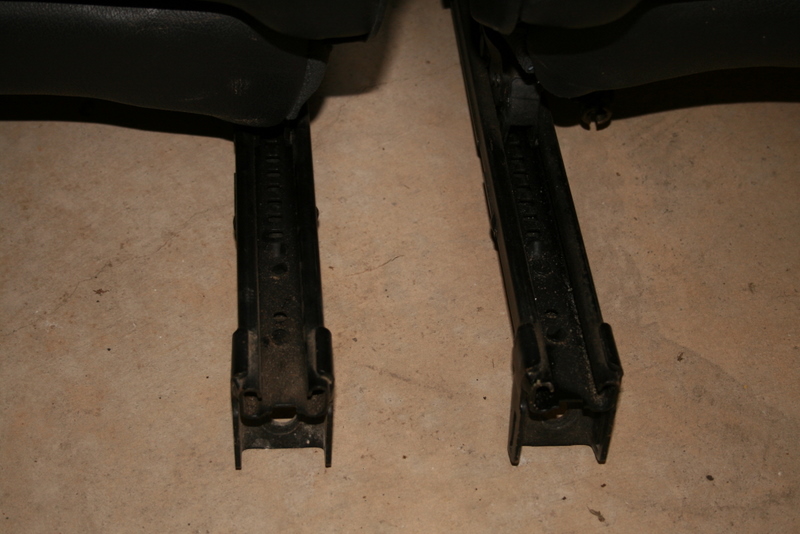
The floor pans are different. The rear mounting points on the VZ rails don't lineup, and are designed to bolt in at 90 degrees:


There are two approaches to fitting the seats - the first is to mount the seats by modifying the WB floor. This involves welding a tab of metal onto the floor to suit the VZ seat brackets. Another vanner sent me some photos of such an installation (Thanks Dean!). The second method is to modify the VZ seat rails to suit the existing seat mounting points. For various reasons, I decided to try the second way - so this is it. The first way probably would have been easier. Very Happy

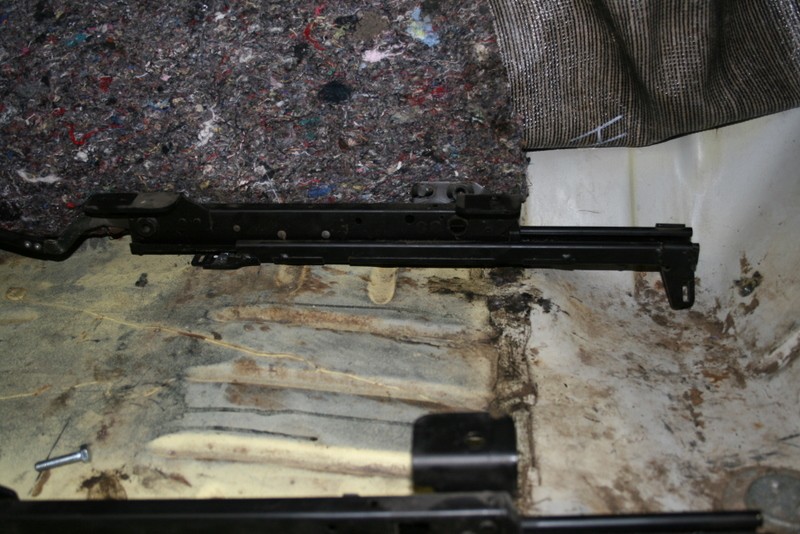
Step 1: I removed the new seat from the rails, and placed them in the van to see how things would line up.

Remember to take your old seat out first, otherwise it could get awkward.

I started with the passenger side first as it's easier. I used a level to try and work out what height the rails should be - the confusing thing is that the seat rails look as though they are designed to sit at an angle in the Commodore, so mounting them level in the van would have created an awkward seating angle.

At one point I took the rails out of the van, put the seat back on the rails, then sat in it to try and get a feel for the correct angle. I put a level on the rails, then moved the rails into the car and tried to get the same level.


Step 2: As you can see from the photo below, there's a lot of brackets at the rear of the VZ rails. I cut these off, as I wasn't going to use them, and they were in the way.


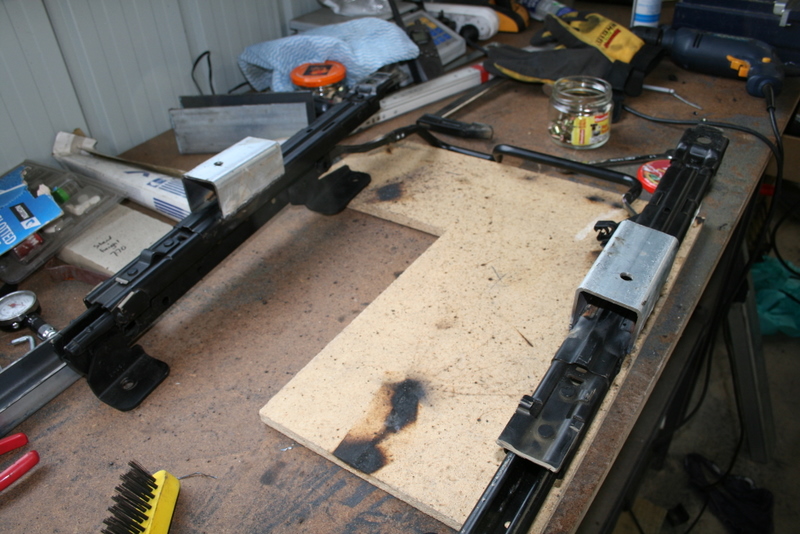
Step 3: Putting the rails back in the car, and using the level, I worked out what sort of bracket I needed to make to weld onto the seat rails. In the end (for strength) I decided to cut a 100mm long piece of "U" bracket. I made a template from cardboard to start with, and then managed to score an off cut of some rectangular tube with 2.5mm thick walls from the local metal place.

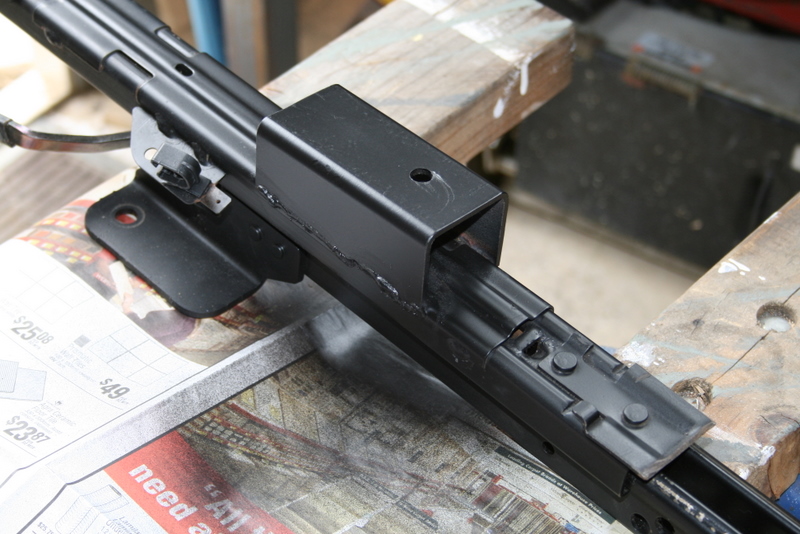
After making the brackets and drilling a bolt hole, I welded them in the correct place to the bottom of the seat rails:


Step 4: Back to the car, to make sure that everything lines up. All good. Hit the the new work with some matt black paint, and it's starting to look factory:


Step 5: Bolt the seat back to the rails, then bolt the whole lot back into the car. This proved actually to be very fiddly, as the bolt has to be put through the bracket from inside the "U" piece. My best friend here is a set of ratchet ring spanners which made the job a little easier.

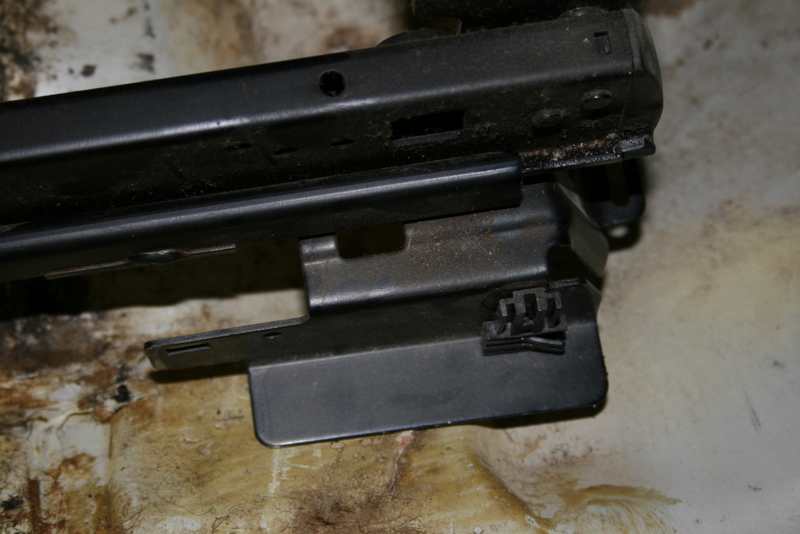
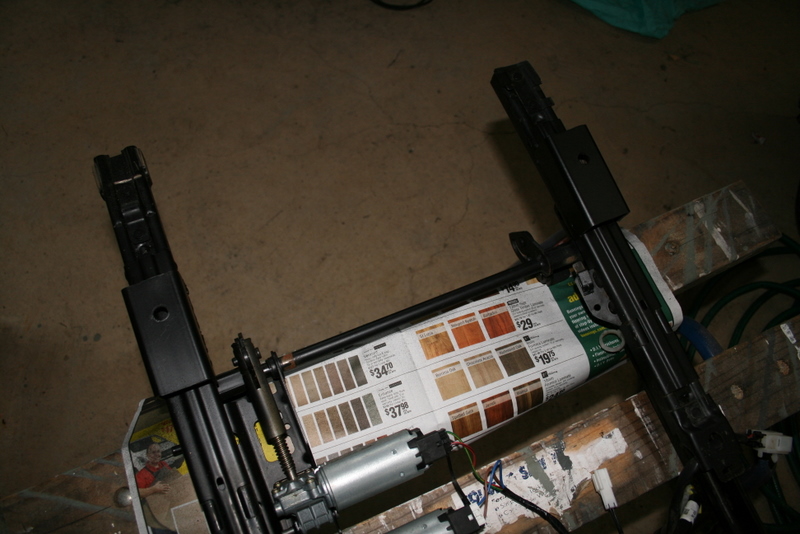
Step 6: Do the driver's side, as above. With the driver's side, there are some motors on the seat rails which are used for electric height adjustment. This time I decided to do all the work on the rails, and bolt them in place first, then bold the seat on top after wards. The photo below shows the drivers side after painting. You can see one of the motors in the picture:


Step 7: Connect the wiring up! As you can see in the picture below, there's a connector which comes from the driver's seat. I cut this, made my own connector and using a fuse and some wire I ran this to the car's fuse box - patching it in so that it's only live when the ignition is turned on.


Step 8: Sit in your new drivers seat, nursing a beer, playing with the electrics, and grinning like a mad man.

Tuesday, October 12, 2010

350 versus 253

Once again, it's been a while since my last posting, but that doesn't mean nothing has been happening. 

The 350 Chevy motor has been stripped, and is in need of some specialist work - it basically looks good, but need a lot of new moving parts.  When I have some spare cash the block and heads will go out for a clean and inspection.

In short term as least, the plan is to keep the 253 in the car and run with it.  Why? Because the engineering cost for the replacement motor is more than I will wind up spending on the motor itself.  The blue 253 with HEI ignition and the Quadrajet is a top motor, and still runs really well, so there's no hurry to replace it.

As a result, I've decided to make some changes.  I've removed the dual fuel system.  There are a number of reasons - clean up the engine bay, the tank is years out of date, and I can get it tuned to run properly on petrol.


As you can see from the photo above, there are still some items to remove, and the plumbing and wiring will be cleaned up further when the manual fuel pump goes on - removing a lot of the crap associated with the electric fuel pump.

The other change will be some new seats going into the van. 


These seats have come from a VZ Berlina (Commodore).  Should look good when installed - no, they don't bolt right in, I need to make up some brackets.

I'll post another entry when the seats are fitted.
Cheers!

Friday, April 23, 2010

Some progress has been made with the engine tear down.  So far it looks as though there's some wear here and there, however the overall condition is not too bad. Pictures tell the story.


No roller rockers here! Pushrods will be replaced as the ends came off two of them, and I found a crack in another.


Another view.


One head is off.


Some pitting on the top of this valve. This was the only one affected.


The rest of the valves looked like this.


Some carbon build up on the piston tops.


Valve train organiser tray is a good way to keep things in the right order.


Heads and sump removed. You can see the oil pump and pickup.


Engine flipped over. No 4 bolt main here - two bolt only.

Thursday, April 22, 2010

Van Nats 2010

Engine strip down is progressing - more photos in the next day or two.


In the meantime, we went to the show and shine for the 2010 Van National at Phillip Island, and took a bunch of photos.  You can find them here:

http://gallery.perryr.com

Tuesday, April 6, 2010

Engine strip down

Yesterday I had a chance to put the SB Chev on it's new stand, and start stripping it down.

I wondered whether it was worthwhile doing a rebuild, as it was running when I got the car - as you will see from the photos, if I'd shoved the Chev into the van as is, I would have been taking it out again soon.

Enough talk. Time for pictures.

The new engine stand. Ripper!


The engine on the trailer at home


Very neat cradle that Dave put together for me


On the stand, about to be removed from the trailer.


Finally, on the stand!


Strip down starts


Timing chain is waaay loose


Yep, waaay loose!


Both cogs and timing chain will be replaced with double row units

More picture of the strip down soon.

Tuesday, March 30, 2010

Engine at home

Well, I finally have the small block Chev engine sitting in the shed at home. Pretty soon I'll start stripping the motor and then (all being well) starting the rebuild.

Stay tuned for some activity and photos!

Tuesday, January 12, 2010

Chev 350 history

While I wait to start work on the Chev 350 engine from the donor ute, I thought I'd track down some of the history and find out exactly what I've got to work with.

These are the numbers on the block:

Engine casting Number: 3970010
Engine ID: K0315TKB

First, the casting number. A "3970010" is:

Year
1969-79
Casting
3970010
Capacity
350
Low Power
185
High Power
370
Main Caps
2 or 4
Application
car, truck, Vette

So, the casting number doesn't narrow it down much - if i was lucky, the engine started as a 370hp Corvette engine. If not, a low power pickup truck engine. In some ways, a low power engine wouldhave less stress, so that might be a good thing.

Next, the Engine ID:

K = Ontario, Canada Engine Plant
03 = March
15 = 15th day of the month
TKB means the following specifications:

Code
TKB
Year
1976
Capacity
350
Application
conv.cab
Engine Code
L LS9
HP
165
BBLS
4
Body
C-10 & 1500
TKB 1979350conv. cab, m/tL LS91654C-30 & 3500

So, it seems that my engine was made in Canada in 1976 or 1979. It's a LS9, built as a 165HP 4 barrel unit, for pickup trucks - one of C-1, C-30, 1500 or 3500 depending on the year.

Not very exciting, but perhaps it's had an easy life - sometime soon I'll be stripping the motor down.

Thanks to Dave for sending me the numbers.
References I use to decode the numbers can be found here:

http://www.nastyz28.com/sbchevy/sblock.php

Friday, November 13, 2009

Quick trip to Torquay

Took the van out for a quick run down the road a couple of weekends ago to Torquay for the annual show on The Esplanade. A good turnout (I'd say a couple of hundred cars at least) and plenty to look at.


Wednesday, September 9, 2009

Help! What brakes are these?

Well, I'm averaging about 6 months between posts here, so I thought it was time to try an improve the average.

As you may (or may not) remember, there's an old HJ ute sitting on a property somewhere in country Victoria that has a 350 Chev, Turbo 350 transmission, and Ford 9 inch diff in it. The whole drivetrain will eventually be transplanted into the van.

My brother-in-law was either a bit bored or got tired of having the ute sitting around, so he ripped out the engine and transmission. Looks a bit tired now, but all good things start from humble beginnings! A few photos for you.

The diff and steering gear still needs to come out, then the shell will be sold off.


Rear shot - tranny is still attached.


Front shot - transmission oil cooler still attached.
All the bits I need are there - somewhere!


Side shot - I believe that it's now sitting on a custom welded frame :-)

One of the things I don know about the ute is that the wheel stud pattern all around is Ford. It looks like it was better to put a later model Ford wheel hub and brake setup on the front. I'll probably transfer the whole thing over to the van and look for some wheels to suit.


Help! Can anyone identify the brake calipers in the shots below? I'd like to know what model Ford they came from :-)

What do these calipers originally come from? Click on the picture to zoom in.


Another view. If you can identify them, please leave a comment. Thanks!

Tuesday, April 7, 2009

Another Van Show - Easter 2009

Not great, I'm averaging one entry on this site every 6 months. Oh well....

Went for a drive last weekend to make sure that our donor ute was still where it should be - I'm pleased to day that it is, and that there's some chance of the 350 Chev coming out of it soon.

In the meantime, the Yellow Van will be at the Van Nats 2009 in Geelong this weekend (on the Sunday anyway).


Click on the image above for more details, and if you are in or near Geelong it will definitely be worth a look!

Tuesday, September 30, 2008

Update - long overdue!

It's been a while since the last entry, so I thought I'd better put an update in, just to prove that things are alive and well!

Not much has changed for the van in recent months - building and moving into a new house have seen any time we had to put into the van disappear.

On the positive side, we have a new shed where we can put the 350 and running gear from the ute, so the plan is to move those things in over the next few months and start working on them.

In the meantime, here's a local event which may be of interest:


Tuesday, April 15, 2008

Front Off

Did some work on the donor ute over the weekend and prepared it, ready for the motor to come out.

Took out the radiator, radiator support panel, unbolted the exhausts, disconnected all the wiring etc.

I ran a compression test on the engine before the disassembly, and found that one cylinder was slightly (20psi) below the others. After the engine is out we will be taking the heads off and checking things out - a new set of gaskets and welch plugs will be the go!


Doesn't look all that flash now - but keep watching!


Wednesday, March 26, 2008

Van Nationals 2008 and 2009

Van Nationals 2008 - come and gone! We went over to Port MacDonnell (near Mt Gambier) for the 2008 Nats, and saw some great vans, met some nice people.

Pictures can be found in the Van and Ute Gallery here:


The Van Nationals of 2009 will be held in Geelong at the Showgrounds, and should be huge!

Some early information is already available here:

Tuesday, March 18, 2008

Safety first

Well, the old van is a bit safer now. The brakes were behaving badly, and a simple check of the components and bleed wasn't enough to improve things much.

I gave the van to the pros who decided I needed a new master cylinder, some work done on the calipers, and the front rotors machines.

The end result is a hole in the bank account, but at least it stops properly! I'll put some pics up here soon.

Friday, March 7, 2008

Engine update

A couple of weeks ago we moved the ute out to a place with a bit more space, and I stripped some bits off and sold them on eBay. The ute is rusty, and while it would have looked pretty good a few years back, the bog is falling out and it's very sad.

The good news is that the engine started, and the ute was driven off the trailer.

The plan is to remove the 350 Chev motor, TH350 transmission and Ford 9" diff, give them a spruce up (and check them out) and them put them in the WB.

This presents some problems from a registration point of view. In Victoria ("The Nanny State") if the engine swap is to an engine offered as an option with that vehicle, then all it's not too much of a problem.

In this case, because the WB never came out with a 350 Chev, so I will need to obtain a VASS (Vehicle Assessment Certificate) from an approved Signatory - this replaces the old "Engineers Report". Once you have the certificate you attend an inspection at VicRoads where you present a completed "Change of Vehicle Description" form, proof of ownership of the new engine, and the VASS.

The other catch is that the new engine must conform to the vehicle anti-pollution parts that the original engine was fitted with. In this case, the charcoal canister, pcv valve, yadda yadda. The way to avoid this is to put the thing on straight gas (cleaner, less emissions), which is what I'll be doing.

Haven't got any new pictures really, so here's a picture of a 350 Chev in a HQ.


Interested in the VicRoads regulations? Here's the link:
http://www.vicroads.vic.gov.au/Home/Registration/ChangeOfVehicleDetails/